Difference between revisions of "Windows Questions"
| Line 1: | Line 1: | ||
<div id="MSDNAA"></div> | <div id="MSDNAA"></div> | ||
== I need some software by Microsoft for a project, can you give it to me? == | == I need some software by Microsoft for a project, can you give it to me? == | ||
| − | <!--Possibly. {{#lsth:Dreamspark Programs | Microsoft Imagine}}--> | + | <!--Possibly. {{#lsth:Dreamspark Programs | Microsoft Imagine}} |
| + | |||
| + | Possibly. All CS students have access to a variety of Microsoft Software through the Azure Portal. | ||
| + | |||
| + | * First, you need to go [https://azureforeducation.microsoft.com/devtools Microsoft Azure Dev Tools for Teaching] and simply click on "Sign In". | ||
| + | * Next, you will be prompted to sing into your Microsoft account. You must use your K-State email address to sign in properly. | ||
| + | * Bulleted list item | ||
| + | * Bulleted list item--> | ||
== How do I take a screenshot in Windows? == | == How do I take a screenshot in Windows? == | ||
Revision as of 11:29, 4 March 2019
I need some software by Microsoft for a project, can you give it to me?
How do I take a screenshot in Windows?
To take a screenshot (image of the screen) in Windows, follow the following steps:
- Press "Print Scrn" on the keyboard (next to "Scroll Lock" at the top).
- Open Microsoft Paint (Start Menu > All Programs > Accessories > Paint).
- Go to Edit > Paste to paste the image.
- Save the image as a BMP in your home directory by going to File > Save As...
- Do with the image as you please.
How do I enable X forwarding in Windows?
The following explains the process of enabling X forwarding through SSH to view X applications in Windows.
- Start XServer by going to Start > XServer
- Open PuTTY by going to Start > PuTTY
- In the Category menu for PuTTY, select Tunnels
- Check the box next to "Enable X11 Forwarding"
- In the Category menu for PuTTY, select Session
- Under Host Name, type "cislinux.cis.ksu.edu"
- Choose SSH as your Protocol
- Now click "Open"
- Enter your username and password when prompted
- Enjoy
You can test to see if X forwarding is working by typing "xeyes", which should bring up an application with two eyes following your mouse pointer.
How do I transfer files to or from the CIS systems?
NOTE: Due to authentication problems and account lockouts caused by WinSCP, we no longer recommend using this application for file transfer. We suggest the following instead.
File``Zilla is a good cross-platform desktop file transfer application that is both free to use and open source. You can download the client from http://filezilla-project.org/ and install it on your own system.
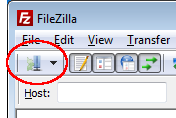
When you launch File``Zilla, the window looks like this:
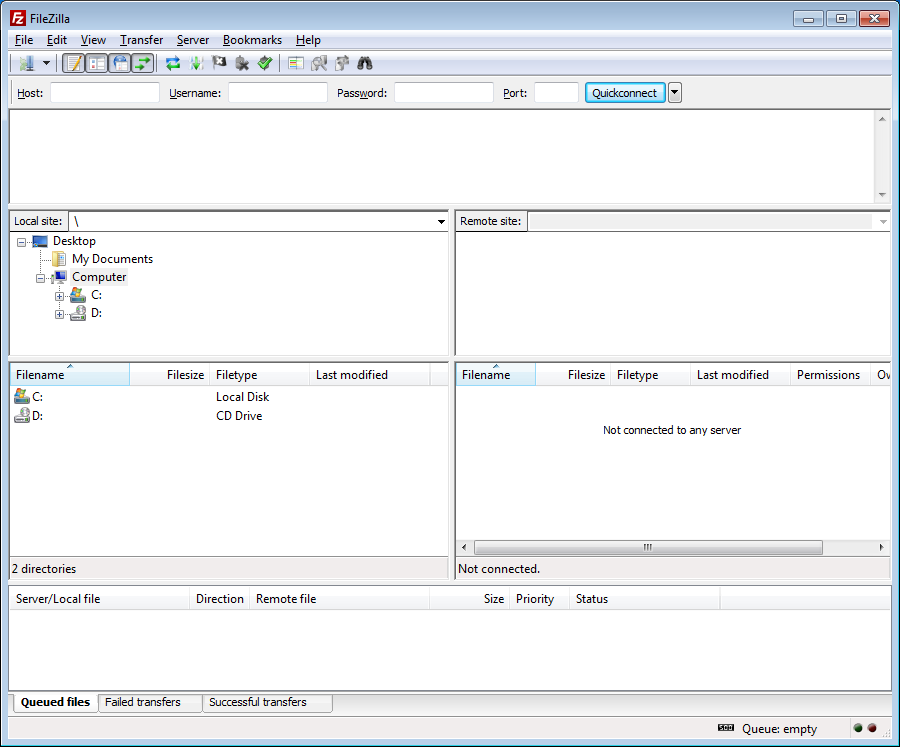
First-time users will need to create a new connection which you can re-use later.
- Click on the the Site Manager button here:
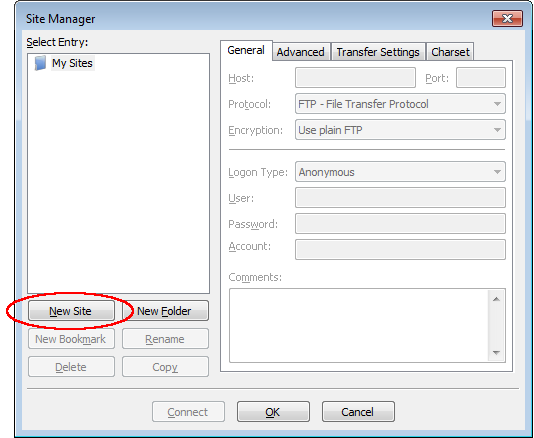
- This opens up a new window. Click on the "New Site" button.
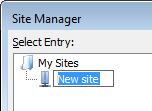
- Set the name of your new site to something easy to remember, like the name of the server you are connecting to.
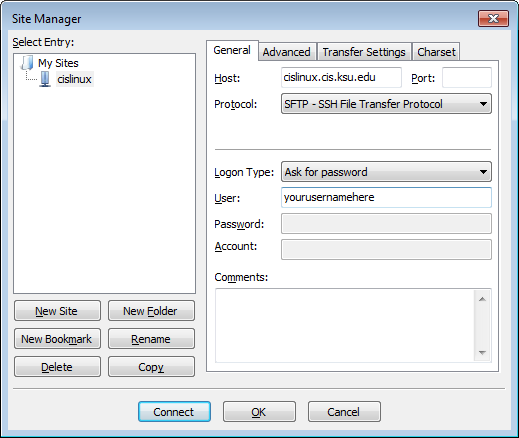
- Make the following changes to the site settings:
- Protocol: SFTP - SSH File Transfer Protocol
- Login Type: Ask for password
- User: enter your username here, not your full email address
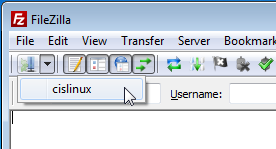
- You should now be returned to the main window. Click on the dropdown next to the Site Manager button and select your newly saved site.
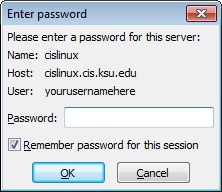
- You will be prompted for your password. Enter it here. NOTE: This is your CIS password, not your KSU eID password.
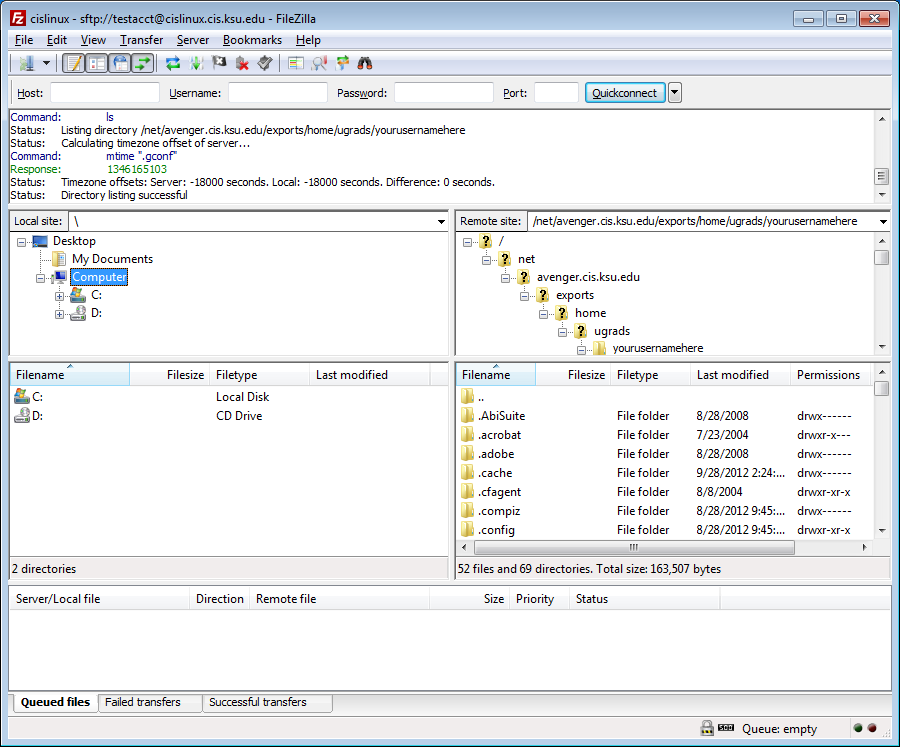
- Once connected, the main window should look like this. Transfer files by selecting the source on the left and destination on the right.
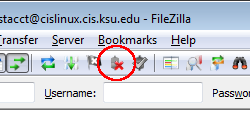
- When you are finished, click on the Disconnect button.
How do I burn an .ISO image to a Disc?
N022 and N126 labs have DeepBurner installed on the Windows machines along with CD/DVD burners. This is free software and is available to download for your own personal use at http://www.deepburner.com/.
To burn an .iso to CD/DVD, place a blank disc in the CD/DVD ROM tray and run DeepBurner. When the program starts, it will prompt you to select the project type. Select "Burn ISO image." Click the "..." button beside the Image file text box to specify the location of your saved .iso file. Click the "Burn ISO" button to begin burning the disc.
